Saturday, 30 March 2013

Drops

Originally I planned to have the environment affect the form, eg. have the sun cause the object to become distorted. However this seems to random so I decided to have drops of liquid alter the form. This seems more deliberate and makes the environment interact with the form a lot more.


Here I changed the glow of the drop to add another element.


Even though the drop above does work well in the environment I think eventually I will remove the solidity of it and just have the glow so it still appears to be drop shaped but is pure light and less intense in the middle.


This demonstrates the drops which are the other colour and how I want the glow to seem less intense in the middle and be simple light, while still holding the shape that I want. 


Thursday, 28 March 2013

Cracking.


From this point I wanted the 'shell' of this object to crack off as it begins to breathe again, revealing a raw red flesh underneath. 

The different ways I could shed the shell were to have it 

Fade away into the new material- this present problems as it seemed to simple and not cohesive with the hard shell.

Have the flesh peel off like sunburn- This would make too many layers and this doesn't seem to relate well to the hard nature of the shell. 

Have it melt away- melting away doesn't seem relative to the hard nature of the object. 

Have bits crack off- this seems the most appropriate. I will use the extract function on Maya to make this possible and have the shell bits crack off and float away. 


I will also have breathing noises reappear as it begins to expand and contract again. They will seem more laboured than the first because it is harder for it to stretch with the outer shell.


Wednesday, 27 March 2013

Hardened pustules


The difference between these two images demonstrates how I want the whole object to come together instead of being separate pustules. So to show how it is now one complete object I made it transform materiality as one.  


Pustules


With the pustules that grow I used approximately 20 blend shapes which all interacted to grow each pustule at the appropriate time. 

These will be accompanied by a sound which makes it seems like ripples in water or drops of water hitting something. This is because they grow from one central object, like ripples.


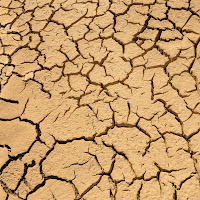
This is the material I used for the pustules. I wanted it to be the same as the cracking ground which I used for the previous material so I simply added a pinker colouring over the top which seems softer and made the cracks smaller so they still give a texture, but one that is less dramatic.

I also made this texture shinier to show that it is soft and almost gooey. 

Tuesday, 26 March 2013

Shine


These are just basic forms to show how I could utilise the shine of the material to affect how it is seen by the viewer, eg. whether they see it as a wet material or whether it is more of a soft material.

Monday, 25 March 2013

Bump mapping


The second of these is subtly more bumpy than the first, something I'm aiming for as it is supposed to be mimicking a cracked earth texture. However I didn't want it to be excessively bumpy as it may have effected the actual shape of the form.


 The first four images on the side show the progression of a bump map which pushes inwards, however as I am trying to create a veiny type of texture this is unrealistic.


These last two and the one I have chosen push the bump map outwards, however the two here are slightly too intense. This is why I have chosen the larger image above where it is subtle but effective.

Hardening


This shows the progression of the curling up and changing of texture within the object. While this happens there will be sounds of cracking.

I have decided to use the sound of cracking ice instead of a sudden crack because the hardening is done in short bursts which are not sudden but take a second or so, meaning the noise must be prolonged slightly. 


Materials:


This seems too bumpy and separated because I want the cracks to be noticeable but flat.


The cracks here are too wide as I don't want to be able to see into the form, but merely want slight divisions.


The colouring here is not cohesive with the previous material in the animation and I want them to be connected as it is merely the same shape just distorting.


Chosen material- the cracks are an appropriate depth, with the ground staying flat. It also seems to be relatable to the material used for the soft breathing object.


Saturday, 23 March 2013

Breathing


Here I have edited the shape of the original form to be more defined that the one I started with. This looks a lot cleaner and more deliberate than the bulbous shape I had. 

For the movement of this object I'm going to attempt to make it appear as if it is breathing or stretching. To achieve this I will make the expansion of the object appear quick and the 'exhale' slower to mimic real breathing. 


This shows my first trial of the object breathing and hardening into a new shape which is curled up from what seems like dehydration. I will make this change more deliberate and a different speed as it is too quick to really be comprehended properly.

These are materials which show the type of flesh I want to portray with this first object. I chose the 3rd option because it shows the pink fleshy tones I wish to emulate and makes the object appear soft. 


Thursday, 21 March 2013

First basic animation


Basic modelling and animation trials. Here I have attempted to animate my first shape, mimicking how a muscle stretches and also the movement of breath. It also shows the slow transition of the material within it.

As the material changes I would make the breathing slow as to show restriction as the material hardens.


Tuesday, 19 March 2013

Test textures

Here I was attempting different textures which I am considering using within my design. I have experimented with bump maps and specular shading as well as manipulating basic textures.


Thursday, 14 March 2013

Concept Sketches


Precedent for concept 3


Salvidor Dali's work was created around the surrealist movement and throughout these paintings displayed above I noticed a common thread when it came to saturations and hues. The yellow tinges that are present throughout his works founded the inspiration for my first concept.

These hues are often reminiscent of sand and are sometimes potrayed as sand within the painting and for this reason I have taken sand as an inspiration for my first frame. 


However throughout the paintings this 'sand' or object which can be compared to sand, is often stretched or morphed into a melted state. Therefore I related this to sand which is struck by lightning, creating 'fulgurites' where the sand is melted and takes a new structure.

Precedent for Concept 2


Salvador Dali's "Geopoliticus Child Watching the Birth of the New Man" became the inspiration for my second concept.

I was interested in the way that he extracted the idea of birth and showed it from a less conventional angle, so this will be my aim- to show the emotion or principle of the act.

Therefore for my concept there is an object which is originally broken and hard, with cracks and openings which is then touched by an outside force, causing it to slowly repair and close itself up. This draws parallel to the way Dali takes normal conventions and plays with them as it reverts the idea of something breaking because of a force while still portraying the positive emotion that is often attached with birth.

Precedent for Concept 1


Damien Hirst's works highlight how a simple object can have an intricate interior, shown by the internal organs of the animals he displays and also through an interpretation of the human skull and its value. 

This inspires a concept which will attempt to bring a focus to interior complexity. I will strive to portray this by demonstrating how something that has been manipulated slightly can come to show something unexpected on the interior. For instance I will show how an object which is affected by light can crack and mutate, revealing a disgusting interior.

Tuesday, 12 March 2013

Practice modeling

Here I have looked into using the smoothing function within Maya. This tool can be clearly seen within the first four photos, with the photos on the left showing the before and the right showing after the smoothing tool has come into affect.


These bottom two images show how I have utilised the smoothing to create a form which is very droopy and has the appearance of melting which is what my form needed. However I will have to be selective of when I use the tool as it creates very curved edges which are not always ideal.

Thursday, 7 March 2013

Beginner tutorials


Base tutorial on extruding and basic modeling with image planes.